- "Slaying the Badger" - A 30 for 30 ESPN film about the rivalry between Greg Lemond and Bernard Hinault in the 1986 Tour de France.
- "Half the Road" - About the disparity in Men's and Women's professional cycling. Excellent!
- "Personal Gold" - About the U.S. Women's track cycling pursuit team's run for a gold medal at the 2016, London Olympics. Very inspiring!
- "Pantani" - About the phenomenal Italian climber, Marco Pantani
- "Clean Spirit" - About the 2014 Argos-Shimano Tour team and in particular, sprinters Marcel Kittle and John Degenkolb.
- "Bicycle" - About history and current state of cycling in the U.K.
- "Bikes vs. Cars" - About the dangers of cycling in the city of Sao Paulo, Brazil
- "Rising from the Ashes" - About establishing cycling teams in Rwanda
- "Ride the Divide" - About an unusual Mt. biking endurance event in the U.S riding from Canadian to Mexican boarders along the continental divide.
- "Road to Paris" - About Lance Armstrong and US Postal team preparation for 2001 tour, minus doping strategies of course ;)
- "A Winter of Cyclists" - About commuting to work by bike in the winter months in Colorodo (very cold conditions!!!)
- "The Road Uphill" - About Frank and Andy Schleck in 2011 Tour.
- "Oprah Interview (first half)" - Lance Armstrong's public admission of doping.
- "The Armstrong Lie" - About Lance Armstrong's comeback attempt to win 2009 Tour. Also includes a lot of footage of interviews of Lance talking about doping.
- "Stop at Nothing: The Lance Armstrong Story" - Australian documentary about Lance Armstrong's doping, intimidation tactics and cover up. Goes into a lot of the seedy side of Lance Armstrong's behavior
- "Joe Rogan Experience #737" - Interview with Lance Armstrong
- "Howard Stern interview with Lance Armstrong" - Interview with Lance Armstrong. I am not a fan of Howard Stern but, honestly, he uses quite a bit of skill here to tease information out of Lance Armstrong.
- "Tyler Hamilton at Oxford University" - Frank and honest discussion about doping in cycling
- "Greg and Kathy Lemond, Betsy Andreu and others on a panel about doping"
- "Science of Cycling" - Honestly, I think the scientific merits of the data presented here are not fully supported.
- "Cycling's Greatest Fraud" - National Geographic documentary about Lance Armstrong and doping
Wednesday, July 5, 2017
Great Cycling Movies
Just a quick post to list a number of excellent cycling movies and documentaries I have found on Amazon Prime, NetFlix and YouTube.
Sunday, November 1, 2015
Troublesome, Recurring and Slow Leak Flats
I've had a few experiences with recurring flats. After spending 20+ minutes on the side of the road and not finding the cause of the flat, I'd shrug, replace the tube and have a flat soon again.
These aren't catastrophic blowouts. You don't hear air escaping. It isn't like everything is fine one moment and the next the tire is flat. Eventually, the bike just starts to feel sluggish and handle poorly. These are slow leak flats. That means teeny tiny holes.
Ordinarily, after replacing two brand new tubes and having them go flat, the simplest thing to do next is replace the tire also. But, I ride Continental Grand Prix 4 Season 25 mm tires. They are great tires. They often last more than 3,000 miles without a single flat! And, these miles were on roads I've ridden over many times before with other brands of tires and fairly routinely wound up getting flats.
So, I like these tires a lot. I've had good success with Specialized Armadillo tires too. But, the Continental Grand Prixs handle quite a bit better too. They also cost more than my car tires; $50-65. So, just replacing one because I can't find the cause of a flat isn't a great solution. At any rate, unless you happen to also carry an extra tire on your rides (I often do), replacing the tire is only an option if you happen to flat within walking distance of bike shop.

It'd be a shame to toss out an otherwise perfectly fine $50 tire due to such a small bit of metal!
These aren't catastrophic blowouts. You don't hear air escaping. It isn't like everything is fine one moment and the next the tire is flat. Eventually, the bike just starts to feel sluggish and handle poorly. These are slow leak flats. That means teeny tiny holes.
Ordinarily, after replacing two brand new tubes and having them go flat, the simplest thing to do next is replace the tire also. But, I ride Continental Grand Prix 4 Season 25 mm tires. They are great tires. They often last more than 3,000 miles without a single flat! And, these miles were on roads I've ridden over many times before with other brands of tires and fairly routinely wound up getting flats.
So, I like these tires a lot. I've had good success with Specialized Armadillo tires too. But, the Continental Grand Prixs handle quite a bit better too. They also cost more than my car tires; $50-65. So, just replacing one because I can't find the cause of a flat isn't a great solution. At any rate, unless you happen to also carry an extra tire on your rides (I often do), replacing the tire is only an option if you happen to flat within walking distance of bike shop.
Finding the Cause of the Slow Leak Flat while on the Side of the Road
Even before you remove the tire from the rim, take a good visual inspection of the tire and then also run your fingers over it, both the main tread and sidewalls taking care to avoid cutting your fingers with any sharp debris that may be protruding from the tire. Sometimes you will find a tiny bit of metal but that is obviously not the cause of the flat because it isn't poking all the way through the tire. Sometimes, you will find nothing on the exterior surface of the tire because its actually embedded itself within in the tread.
If you're lucky, you've only spent a few minutes looking for the cause of the flat and can now confidently replace your tube knowing you've corrected the problem. However, if you didn't find the cause from inspecting the exterior of the tire, in all likelihood the problem is small bit of metal on the inner surface of the road side of the tire.
Next, start by removing one bead of the tire from the rim all the way around. If you are in quiet conditions where you could potentially hear air escaping from a small leak, it might be possible to inflate it a bit and then listen for air escaping. Alternatively, you can to remove the tire completely from the rim but keeping the tube and tire fixed in their relative positions and try inflating and listening for the leak that way. If you can narrow in on the leak by listening for escaping air, this helps to find the section of the tire where the problem is and you can mark it with some scratches on the tire surface.
Next, you can remove the tube from the tire but do so in such a way that you can remember (approximately) their relative positions. Inflate the tube by itself and then hold it near your ear listening for and feeling for escaping air. If you find the hole on the tube and if you remember the tube's approximate relative position to the tire, you can then identify the section of the tire where the cause of the flat must be.
Otherwise, you will have to inspect the entire inner surface of the tire as well. Its best to feel with your fingers. Curl your fingers inside the tire and slowly slide them all along the inner surface. But, be careful! If there is something sharp poking through, you can cut your fingers. Use your fingers to feel all along both the walls of the tire as well as the road-facing part. Finally, take one of the tire beads, pinch it between thumb and forefinger and run your fingers around the entire circumference of the tire. Then, do the same for the other bead.
At this point, if you still don't have a good candidate for what is causing the flat, make another pass over the tire inner surface. This time, however, do it in sections of a few inches each. Grab a section, turn it inside out (as much as possible) and then flex the tread back and forth. Eyeball the inner and outer surfaces as you flex it and then after eyeballing, again run your fingers over the surfaces. Small bits of metal will work their way out and reveal themselves when the tire is flexed like this.
The last thing to check is the rim. Again, use your fingers and slide them all along the rim surfaces that contact the tire. Also, visually inspect all the spoke holes to make sure they are covered with rim tape and nothing sharp is possibly contacting the tube surface. If there is a problem with a spoke poking through the rim tape, you can temporarily remedy that with a few layers of paper (even paper money) or a tube patch.
If you still can't find the cause and if the leak is slow enough, then I hope you have a pump and not just CO2 cartridges. That way, you can still limp home by stopping every so often and re-inflating your tire.
Finding the cause while at Home
When you are back at home, you have one additional tool you don't usually have at the side of the road; a sink full of water. If you've tried everything described above and still can't find the cause of the flat, you can immerse sections of the whole wheel, rim, tire and tube, together in water and watch for bubbles.
However, its best to have one bead of the tire off the rim and the tube just partially inflated. If you have the tire wholly on the rim and the tube fully inflated, escaping air often travels along the rim to the valve stem hole where it escapes to form bubbles leaving the false impression that the cause of the flat is at the valve stem. So, remove one bead of the tire from the rim and partially inflate the tube. Then immerse sections of the wheel in water and watch for bubbles. Wherever the bubbles are, you are near the section where the cause of the flat is. Mark it with a Sharpie, then remove the tire and start looking at it with a fine tooth comb. You'll find it.
However, its best to have one bead of the tire off the rim and the tube just partially inflated. If you have the tire wholly on the rim and the tube fully inflated, escaping air often travels along the rim to the valve stem hole where it escapes to form bubbles leaving the false impression that the cause of the flat is at the valve stem. So, remove one bead of the tire from the rim and partially inflate the tube. Then immerse sections of the wheel in water and watch for bubbles. Wherever the bubbles are, you are near the section where the cause of the flat is. Mark it with a Sharpie, then remove the tire and start looking at it with a fine tooth comb. You'll find it.
On a few of occasions in the last 30 years of riding, I've had such hard to find flats. When this has happened, ultimately the problem was a tiny bit of metal wire embedded in the tire tread such as you see at the end of the pliers in the picture below.
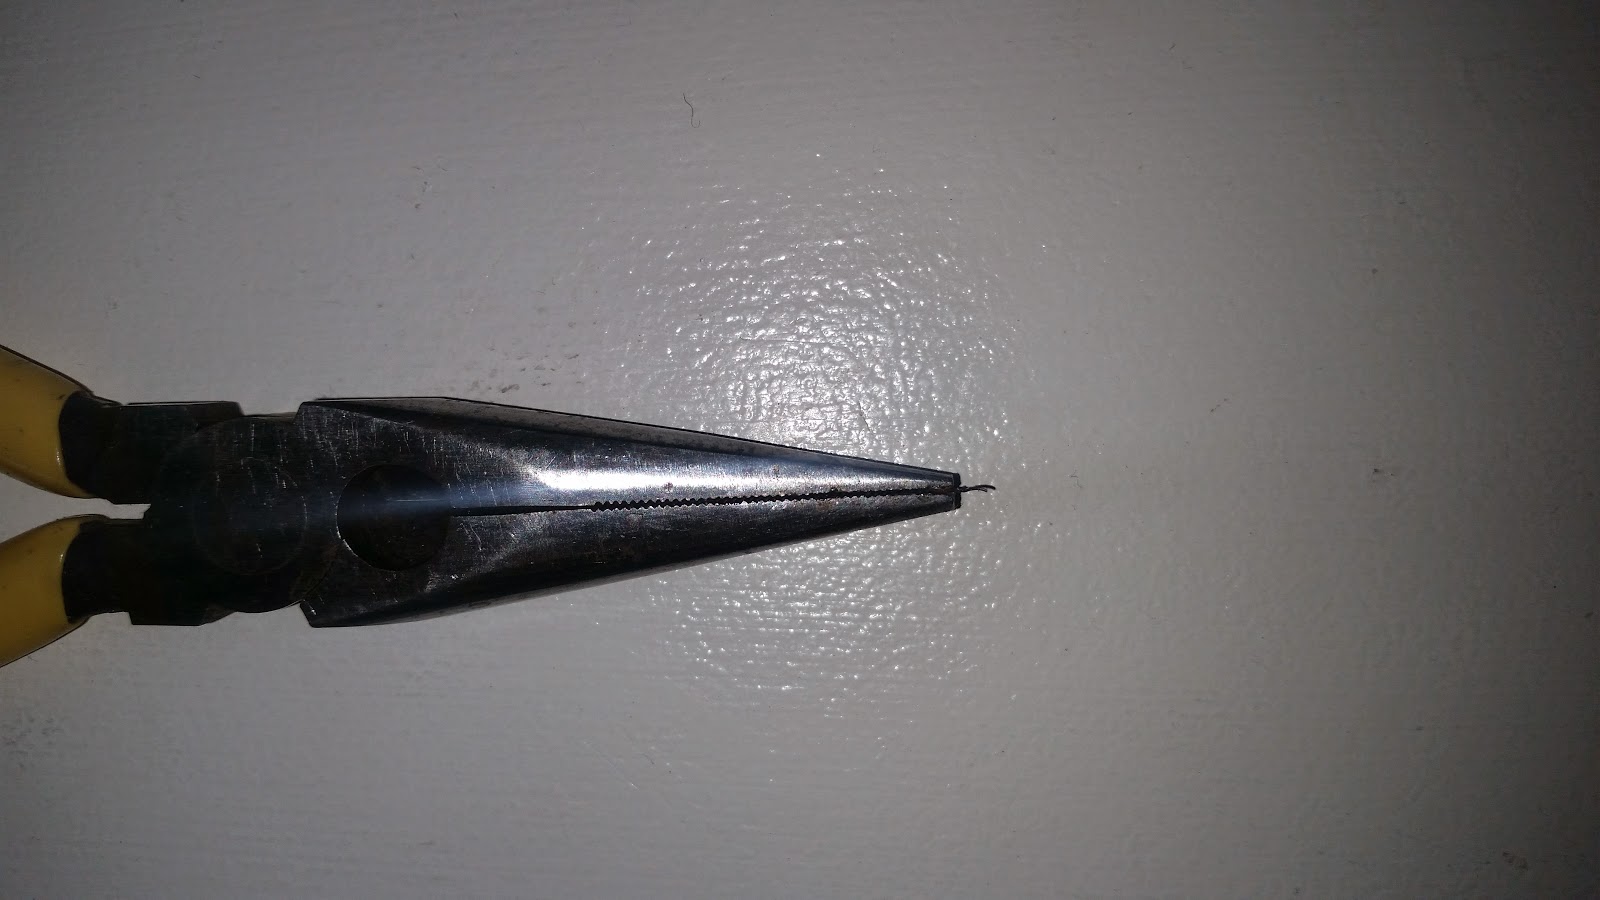
It'd be a shame to toss out an otherwise perfectly fine $50 tire due to such a small bit of metal!
Saturday, October 31, 2015
Sydney's Face on a Pumpkin
I've been riding but not writing. I haven't had much to say. But, its Halloween today and I wanted to carve a pumpkin for my grand-niece, Sydney with her face on it.
Years ago, I saw an episode of Rosanne and at the end of the episode they had all these cool pumpkins, real pumpkins, carved with the faces of the actors. They were phenomenal. You can see one on the cover of the DVD of the Rosanne Show Halloween specials.

I wondered if I could do that same thing. So, a long while back I tried doing a pumpkin of my wife's face. I didn't have a good camera to take a picture of it at the time. So, video taped it.
This is a VHS video of it illuminated by a small candle. Its the only proof I have that I once did it.
Well, I wanted to try again for my grand-niece, Sydney. There is actually a fairly lengthy and detailed sequence of steps to follow starting with getting a good photograph. Then, you have to enhance it to high contrast with decent shadow contours on the subject's face. You have to avoid really fine/small details that you can't easily carve into a pumpkin. You have to select a good shaped pumpkin. You have to print the photo and transfer the pattern to a pumpkin. Finally, you have to carve the pumpkin.
The carving technique described here is the simplest. You just carve complete holes in the pumpkin. In more advanced techniques, you don't carve all the way through the pumpkin surface. You carve to various depths creating various shades of dark and light areas. That's much more technically challenging than I was willing to try.
Taking A Good Photograph
First, you need to get a good photograph of the person's face. It can't be any photo though. You need it to be a high contrast photo with the person's face illuminated from the side. The smaller and brighter the light source, the better. A decent flashlight will do. Or, a desk lamp.
You want a picture that shows the subject's facial contours through a pattern of light and shadow on their face.

So, you need to position the light mostly to one side of the person's face but slightly in front like the diagram above. Also, turn off all other light sources in the room and turn off your camera's flash feature. Finally, don't position the camera too close to the subject's face. Its fine if the camera is 5-10 feet away. But, because you are taking a picture with very low light, you may need to be sure to hold the camera very steady for several seconds to allow it to focus and take the long exposure necessary to capture the picture.
Try several different positions of the light and have the subject make various faces (scary ones or pleasant ones). If you position the light above or below, you will get dramatically different facial contours from the different patterns of light and shadow.
Sydney lives a few states away. And, her mother didn't have a very decent light source. It was a small LED toy with a light with a blueish hue. But, she took several pictures and sent them to me. Here are some examples.


Honestly, these pictures are pretty bad and I was still able to use them to get a good result. But, I had to spend about an hour in Adobe Photoshop playing with various images and with various image enhancements to finally get a decent image. I finally decided to work with the image on the left.
Processing the Image in Photoshop
Ultimately, you will need to produce a black and white (one bit) image; also known as a threshold image. That is, an image that is composed of either large pure white (no gray) or pure black (no gray) regions. Here is an the final result I produced from the image on the left, above.

I have Adobe Photoshop. But, many other image tools would probably work. Here is what I had to do to enhance the image in produce the one above.
- Change the image from RGB color to Gray Scale image
- Adjust brightness and contrast of image so the lighter regions are above 50% grayscale and the darker regions are below
- Photoshop has a real convenient image adjustment tool called the Exposure tool. It has 3 sliders that allow you to easily vary the controls and immediately see the effects on the image. So, you can quickly find settings that result in a suitable image.
Printing the Image
You will note that the image above is mostly black with some light regions. Printing such an image is going to use a lot of ink. So, reverse it. Photoshop has a function to do that to. It changes black to white and white to black.
Selecting a Pumpkin
You want a pumpkin that is taller than it is wide, like most faces; about the same size as an standard sheet of paper. Honestly, a bigger pumpkin is even better because you can enlarge the printed image a bit giving you more room to cut the smaller details of the image.

Transferring the Pattern to the Pumpkin
Ok, so how do you transfer the printed pattern to the pumpkin? Well, first you need to carve out the insides of the pumpkin


Then, decide which side of the pumpkin you plan to cut with the pattern. Turn the pumpkin on its side, clean and dry the surface. Then tape the pattern to the pumpkin with several pieces of tape on each side to hold it well.

Once you begin the process of transferring the pattern, you don't want it to move until you are done. So, make sure it is securely taped to the pumpkin. As a precaution, use a marker to draw a couple of small hash marks across the edge of the paper and onto the pumpkin on both sides. That way, if the pattern comes loose, you can reposition it by matching the hash marks.
To transfer the pattern, you trace along the boundaries of the dark regions, pushing a pencil tip or pin through the paper so that it makes a tiny hole in the pumpkin surface. In the picture below, I am using a transfer tool that came with the set of carving tools I used.

Below is a close up of the eyebrow region I started with. By the way, I cheated a bit with the eyebrow when making the image pattern. I am cutting it here so that light will shine through. But, in the original picture, Sydney's eyebrow isn't bright or in bright light. But, I needed an additional facial feature to help frame the whole image and so I manually touched it up in Photoshop.

Although I started with the carving kit transfer tool, I found the poker tip to be a little too fat and less accurate in tracing around the boundaries of smaller detail regions. You can see that in the close up of the eyebrow above. So, I switched to a simple push pin.
As you complete each region, you might want to cross it out with a marking pen so you know you've done it. That's especially true if you use a push pin because you can't see the holes easily. Once you have finished tracing all the regions, remove the pattern sheet.
In the photos below, on the left you can easily see the holes created with the carving kit transfer tool. The holes made with the push pin are a little harder to see. Next, take a maker pen and connect the dots. Trace the hole patterns with the pen to help make the pattern more visible. I used a red pen (image on right).


Ok, you've transferred the pattern. But, before you begin cutting it, you have some more carving to do on the inside of the pumpkin just behind the pattern. On that side, it helps if you continue carving out the inside of the pumpkin to narrow its thickness a bit. A pumpkin can easily have a 1 inch thick skin or more. Try carving out the inside of the pumpkin on the pattern side down to around half an inch. This just makes it easier to carve the pattern.
Carving the Pattern
First, you need some good tools. A typical kitchen knife won't do especially for the fine detail (small holes or small variations in the pattern's boundaries). There are plenty of carving kits available in stores around Halloween. Here are some of the tools that came in the kit I bought.

They are basically like tiny saw blades. I used the longer tool to cut the top of the pumpkin out. But, for the pattern, I used the smaller blade with the black and orange handle.
Its best to cut the smaller regions first and leave the bigger regions for last. So, I started on the eye, parts of the nose and teeth first. The smaller regions require finer cutting. Trying to do them when you've already cut out large neighboring regions is more difficult and more prone to accidentally tearing the pumpkin surface.
Finally, when cutting out the larger regions, its best not to try to cut them out in a single cut. Do them piece by piece by cutting the difficult parts of the pattern first and then just cut arbitrary paths through where the hole will be to create smaller pieces you remove. For example, in the picture below, you can cut across the dotted lines to help remove the hole in pieces.

Also, as you cut these larger regions, its helpful to stabilize the back of the surface with your other hand by reaching inside through the top. Just take care not to cut yourself.
Once you've finished carving all the holes, there is still some finishing work to do. The holes on the inside of the pumpkin are invariably no where near as well defined as they are on the outside. There is debris still clinging to the inside and walls of the hole are probably not parallel. These problems are worse for really thick walled pumpkins. The effect is that less light will come through these holes when you illuminate it.
So, the last step is to take some time cleaning up the holes by removing debris from the inside and squaring up the hole walls often by cutting some of the pumpkin wall inside the whole and behind the surface away.
When you're done, you have something that looks like this.


That's a photo of the actual pumpkin illuminated with a 1000 lumen flashlight from above. . .

Its best to cut the smaller regions first and leave the bigger regions for last. So, I started on the eye, parts of the nose and teeth first. The smaller regions require finer cutting. Trying to do them when you've already cut out large neighboring regions is more difficult and more prone to accidentally tearing the pumpkin surface.
Finally, when cutting out the larger regions, its best not to try to cut them out in a single cut. Do them piece by piece by cutting the difficult parts of the pattern first and then just cut arbitrary paths through where the hole will be to create smaller pieces you remove. For example, in the picture below, you can cut across the dotted lines to help remove the hole in pieces.

Also, as you cut these larger regions, its helpful to stabilize the back of the surface with your other hand by reaching inside through the top. Just take care not to cut yourself.
Once you've finished carving all the holes, there is still some finishing work to do. The holes on the inside of the pumpkin are invariably no where near as well defined as they are on the outside. There is debris still clinging to the inside and walls of the hole are probably not parallel. These problems are worse for really thick walled pumpkins. The effect is that less light will come through these holes when you illuminate it.
So, the last step is to take some time cleaning up the holes by removing debris from the inside and squaring up the hole walls often by cutting some of the pumpkin wall inside the whole and behind the surface away.
When you're done, you have something that looks like this.

That really doesn't look too great does it. Don't be discouraged. Things look very different once its illuminated…

That's a photo of the actual pumpkin illuminated with a 1000 lumen flashlight from above. . .

Advanced Carving
What would be really great is to automate the whole process of getting a picture, processing it and then carving it onto a pumpkin. I think we'd need some simple, scriptable image processing software and a computer controlled laser cutter. You could probably turn out a pumpkin every few minutes and start a small business for the Halloween holiday selling "your face on a pumpkin" carvings. Maybe a possible retirement project...
Anyways, Happy Halloween
to my grand-niece Sydney and her mother Latisha.

Sunday, December 14, 2014
Cool-proofing your shoes
Where I live in Davis, California, the biggest problem during the winter riding season isn't so much snow or rain. For a long time, I just had a terrible problem keeping my feet warm. And, that was in spite of the fact that I'd wear two layers of shoe covers along with thicker socks.
What I discovered last year is that a lot of cold air comes in from vents and holes on the underside of my shoes.

In the above picture, I have a different style cleat and it shows all the holes under the shoe including 3 extra holes I drilled to move my Look cleat back half an inch. You can also see the shoe vents. There are two slits just in front of the cleat attachment area and another two just behind. These vents are great on hot summer days. But, during winter months in Davis, they just let too much cool air in.
I suppose you could just caulk the vents and holes shut for the winter and then remove the caulking with a small screwdriver in the spring. I haven't tried that but I am sure it would work ok. On the other hand, caulking doesn't provide much in the way of insulation and its a bit of a mess to remove.
What I do is cut up one or two of my wife's makeup sponges, like the ones pictured here,

and then stuff the pieces into the various holes. Of course, my wife prefers that I take one of her used sponges instead of wasting a perfectly clean one ;)
Now, the sponges won't stay in place without some help. So, after I seal up all the holes, I apply some shipping tape over them.

In the picture above (also showing my Look cleats -- which appear to be in need of replacement soon), you can barely make out the seams of the shipping tape covering the forward vents.
If you make sure the underside of your shoe is clean before you apply the tape, it will adhere to the shoe fine. Unless you wind up routinely getting it soaking wet, it should stay there for the whole winter season. Then, you don't have a mess of caulking to remove come springtime.
On cooler weather rides, my feet stay a lot warmer now. But, I sometimes still have to wear two layers of shoe covers.
I would have titled this post "Winterizing your cycling shoes" but lets be honest…Davis winters aren't anything like what our two-wheeled comrades in Minnesota or North Dakota have to deal with. For real winter cycling tips, I'm sure the folks in that part of the country have a lot of great ideas.
What I discovered last year is that a lot of cold air comes in from vents and holes on the underside of my shoes.
In the above picture, I have a different style cleat and it shows all the holes under the shoe including 3 extra holes I drilled to move my Look cleat back half an inch. You can also see the shoe vents. There are two slits just in front of the cleat attachment area and another two just behind. These vents are great on hot summer days. But, during winter months in Davis, they just let too much cool air in.
I suppose you could just caulk the vents and holes shut for the winter and then remove the caulking with a small screwdriver in the spring. I haven't tried that but I am sure it would work ok. On the other hand, caulking doesn't provide much in the way of insulation and its a bit of a mess to remove.
What I do is cut up one or two of my wife's makeup sponges, like the ones pictured here,
and then stuff the pieces into the various holes. Of course, my wife prefers that I take one of her used sponges instead of wasting a perfectly clean one ;)
Now, the sponges won't stay in place without some help. So, after I seal up all the holes, I apply some shipping tape over them.
In the picture above (also showing my Look cleats -- which appear to be in need of replacement soon), you can barely make out the seams of the shipping tape covering the forward vents.
If you make sure the underside of your shoe is clean before you apply the tape, it will adhere to the shoe fine. Unless you wind up routinely getting it soaking wet, it should stay there for the whole winter season. Then, you don't have a mess of caulking to remove come springtime.
On cooler weather rides, my feet stay a lot warmer now. But, I sometimes still have to wear two layers of shoe covers.
I would have titled this post "Winterizing your cycling shoes" but lets be honest…Davis winters aren't anything like what our two-wheeled comrades in Minnesota or North Dakota have to deal with. For real winter cycling tips, I'm sure the folks in that part of the country have a lot of great ideas.
Tuesday, December 9, 2014
What's a dual flush toilet got to do with cycling?
This is supposed to be a blog about cycling. So, what's a post about dual flush toilets doing here? And, what is a dual flush toilet anyways?
Well, what I have to briefly mention here is so ingenious and so relevant to all drought conscious Californians, not only the cycling kind, I just had to write a short post about it.
So, in spite of the fact that it may well be the lamest segue possible. . .
Whats the first thing you do after getting home from a ride? I hit the bathroom. On the topic of bathrooms, are you familiar with about the simplest, most cost effective, reliable and easy to install dual flush retrofit kit in the world?
What's a dual flush toilet?
A dual flush toilet offers two flush levels; one for #1's (liquid waste) and one for #2's (solid waste) (as an aside, I've always been partial to the 2/3 numbering system where two rhymes with poo and three rhymes with pee). A toilet can use substantially less water for a flush needed only for liquid waste, like maybe less than half as much! Furthermore, since we tend to go #1's more frequently than #2's, the potential water savings is magnified.
Dual flush toilets have been in use in Europe for many years but they haven't caught on much in the United States. However, with droughts impacting the mid-west in recent years and California this year, dual flush toilets are becoming more common.
But, you don't need to replace an entire toilet to get a dual flush toilet. You can convert an existing single flush toilet to dual flush. There are many retrofit kits available. I've tried a few like the Fluidmaster Duoflush and the Tap-n-Flush.
The Fluidmaster Duoflush costs $20-$30. It requires you to disassemble your tank and replace its guts. If you don't have experience with this, it can take upwards of an hour and you might not get everything sealed back up tight the first time. Worse, mine failed after about a year of use. The mechanism involves several moving pieces that slide past one another. The build up of hard water deposits on the mechanism's surfaces eventually ruined proper function. Even worse, the failure mode was to wind up leaving the (effective) flapper valve open so water would just run and run. Just a few days of that can undo all the whole year's worth of water savings!
The Tap-n-Flush is a novel idea and is certainly much easier to install than anything else I've seen. I was able to install it in about 10 minutes. It cost $18 on Amazon and the inventor of the Tap-n-Flush really provides excellent customer support! But, after having some challenges with it and after reading an ingenious comment on Amazon, I decided to return the Tap-n-Flush and go with a much simpler approach; a weighted flapper.
A weighted flapper
The way a toilet normally works is that depressing the flush lever pulls the flapper valve at the base of the tank open. The flapper is buoyed and remains open as water drains from the tank. When the water level falls low enough, the flapper looses its buoyancy and falls shut.
To create dual flush behavior, the flapper must be able to fall closed before water level in the tank drops low enough for it to loose buoyancy. The solution is to weight the flapper by adding, for example, a few washers to the flapper chain.
Purchase several (say 6-10) large, stainless steel fender washers at your local hardware store, similar this one. Disconnect the flapper chain from the flush lever arm and slide some washers onto the chain and down so that they rest on top of the flapper valve where the chain connects to it. You want to use stainless steel washers so they won't corrode or rust. You want to use enough washers such that the weight of the washers will prevent the flapper from doing its thing of just staying open on its own. Make sure you re-attach the chain to the lever arm such that it has the minimum slack.
Once you add enough washers, the flapper stays open only while the flush lever is depressed. The moment you release the flush lever, the flapper valve will close regardless of the water level in the tank. For a short flush (for liquid waste), you hold the lever down 2-3 seconds. For a normal flush (for solid waste), you hold the lever down for 5-7 seconds (or more). It works perfectly!
 |
| Instructions for use on top of tank |
I can't take credit for any of this. I simply read the ingenious, one-line description of another Amazon user whose name I can't recall now or I would definitely have included it here.
The Tap-n-Flush is basically this same idea only on steroids. It adds a weight to the flapper but relies upon an electrical timing mechanism instead of your hand to hold the weight up. You adjust the amount of time the Tap-n-Flush holds the weight up for both short and normal flushes. But, just adding weight to the flapper is the real key to controlling water consumption.
A simple weighted flapper is the KISS (keep it simple stupid) solution. That's it. All it takes is to add several washers to the flapper valve chain. Its the simplest, most reliable, cost effective and easy to install dual flush retrofit kit in the world.
The video below demonstrates it in action.
Friday, December 5, 2014
Target Fixation: Seeing the Whole Picture
The argument goes something like this…
A motorist could possibly become fixated on a cyclist's rear (or front) flasher. Instead of helping a motorist see and avoid you, it can wind up drawing one, especially an impaired one, right to you. Its called target fixation (or the moth effect as in "…like a moth to a flame...") and its an argument used to suggest among other things that its safer to ride with steady lights instead of flashers, dimmer lights instead of brighter and even without lights instead of with. In a nutshell, this provocative argument runs entirely contrary to the conventional cycling wisdom that with greater visibility comes greater safety.
The web is rife with examples of hard-to-explain accidents, frequently involving some kind of vehicle steered by a human with a combination of hands and/or shifting body weight, where the cause is attributed to target fixation; flying, surfing, paragliding, motorcycling, skateboarding, biking, and driving to name a few. Such accidents often appear totally bizarre and surprising to observers. Observers explain that they thought both the hazard and the way around it were plainly obvious, that the driver (or flyer or surfer or whatever) had ample time to both see and react to avoid the hazard and instead, for some inexplicable reason, wound up driving (or flying or surfing or whatever) directly into it, almost appearing as though they had no choice in the matter. Such is the peculiarity of target fixation phenomena. The video below is a good example.
You can see the motorcycle driver, about half way through his turn, get out of his lean too look forward at something that grabs his attention. When he gets out of his lean, the motorcycle drifts to the far right hand side of the road and he appears to just drive directly into two cyclists.
The phrase "target fixation" was originally coined in the 1940's by U.S. military flight instructors to explain repeated incidents where pilots on strafing and bombing runs would sometimes wind up flying their planes right into the targets they were focused on destroying. Over time, the concept has gained broader appeal in explaining a wide range of accidents with similar attributes...
I have experienced this myself while cycling. I see a hazard on the road ahead like a pothole, a branch or some flat hazard. If I stare at it, I can wind up running right over it. I've also experience something like it will driving too. I have seen some very odd vehicle configuration ahead of me on the road. It is something I have never seen before. It looks strange, odd, interesting. I wind up staring at it trying to figure what the heck I am looking at. While all my attention is focused on that, although my vehicle is still well within my lane, I am not paying attention to traffic stopping in front of me.
Certainly, the phenomena of target fixation is a potential risk. My understanding from materials I have read is that it is a more likely to occur in an impaired driver. That is, a driver that might be under the influence. However, what is the greater risk? Riding with bright and/or flashing taillights and encountering an impaired driver that might get fixated and then hit you or riding with no taillights whatsoever and getting hit because a driver doesn't see you or, perhaps almost as bad, causing that driver to have an accident because they are caught by surprise encountering you in the dark, overreact to avoid you at the last moment and wind up injuring themselves?
Lets walk through that again. For target fixation to be the cause of your injury, several things have to happen. You have to encounter an impaired driver. That driver has to become fixated on your taillight. The fixation has to be such that they do indeed wind up hitting you as opposed to a near miss because they react soon enough to avoid an accident. Note that the odds of encountering an impaired driver remain the same regardless of whether you are using a taillight.
On the other hand, consider what has to happen to be injured riding without any taillight. You have to encounter a driver (any driver impaired or not). That's it. That's all that has to happen! On roads without any shoulder, there is typically not enough space for a car and a bike to safely pass each other, especially if the bike's line of track is a typical 1-2 feet inwards from the roadside. The driver must take evasive action just to avoid hitting a bike. If they can't see you, or can't see you soon enough in advance, that won't happen and you'll be hit.
So, while there may be a statistically measurable increase in the likelihood that a cyclist could become the victim of a target fixation accident as a result of using such lights, there is absolutely no doubt whatsoever that there would be a substantially higher likelihood of being the victim of an accident simply because a driver is unable to see them in the dark.
Next, there is the question of motorist's visual familiarity and practice of observing and identifying nighttime traffic hazards. The fact is, we all have practice identifying taillights of vehicles ahead of us on the road. Those lights are large, at least the size of our hands or bigger, constant on, come in pairs (a left and a right taillight). Taillights used in cycling are smaller, about the size of our thumb, are often flashing, sometimes in very bizarre patterns that are strange to unfamiliar observers, and of course do not come in pairs. This suggests using unusual or bizarre flashing patterns for rear taillights may not be the best thing for night riding.
For these reasons, it is reasonable to consider whether many motorists might be unfamiliar with this kind of flasher and upon seeing one for the first time, or at rare times, may wind up spending more attention (e.g. fixating) than one might think trying to figure out what they are seeing. That certainly reads suspiciously a target fixation scenario.
Lastly, if a motorist happened to confuse a dim constant on cycling taillight with a car taillight, the fact that its a smaller light might actually cause a serious misjudgement of distance; the motorist might think the vehicle is much further way than it actually is based on size. This is a good reason not to let your cycling taillight run low on battery power. A healthy battery in a cycling rear flasher often generates enough light to counteract any natural attempts to judge its true size.
In fact, I have experience with a driving problem similar to this with the headlight separation on Saturn sedans. Saturn manufactured its sedans with unusually closely separated headlights. When passing slower traffic on two-lane roads, the headlights from oncoming vehicles are a visual cue for estimating distance. Headlight separation is part of this. When observing an oncoming vehicle in the opposing lane, the closer together the headlights are, the further away the vehicle is. But, because Saturn's sedans have unusually close headlight separation, they can falsely appear further away than they really are causing a harmful misjudgement of distance. If their headlights were more separated than unusual, they would appear closer than they actual are and that would be harmless.
A motorist could possibly become fixated on a cyclist's rear (or front) flasher. Instead of helping a motorist see and avoid you, it can wind up drawing one, especially an impaired one, right to you. Its called target fixation (or the moth effect as in "…like a moth to a flame...") and its an argument used to suggest among other things that its safer to ride with steady lights instead of flashers, dimmer lights instead of brighter and even without lights instead of with. In a nutshell, this provocative argument runs entirely contrary to the conventional cycling wisdom that with greater visibility comes greater safety.
The web is rife with examples of hard-to-explain accidents, frequently involving some kind of vehicle steered by a human with a combination of hands and/or shifting body weight, where the cause is attributed to target fixation; flying, surfing, paragliding, motorcycling, skateboarding, biking, and driving to name a few. Such accidents often appear totally bizarre and surprising to observers. Observers explain that they thought both the hazard and the way around it were plainly obvious, that the driver (or flyer or surfer or whatever) had ample time to both see and react to avoid the hazard and instead, for some inexplicable reason, wound up driving (or flying or surfing or whatever) directly into it, almost appearing as though they had no choice in the matter. Such is the peculiarity of target fixation phenomena. The video below is a good example.
You can see the motorcycle driver, about half way through his turn, get out of his lean too look forward at something that grabs his attention. When he gets out of his lean, the motorcycle drifts to the far right hand side of the road and he appears to just drive directly into two cyclists.
The phrase "target fixation" was originally coined in the 1940's by U.S. military flight instructors to explain repeated incidents where pilots on strafing and bombing runs would sometimes wind up flying their planes right into the targets they were focused on destroying. Over time, the concept has gained broader appeal in explaining a wide range of accidents with similar attributes...
- A machine, steered with the hands and/or shifting body weight.
- An operator gazes and focuses attention on something, often a hazard, in their field of view.
- The operator's hands/body tend to lean, twist, shift weight, in the direction of gaze.
- The machine, even if subtly, winds up moving in the direction of gaze.
- Before the operator is concsiously aware, s/he is heading directly at the hazard.
- The operator is often taken totally by surprise by the realization that s/he is now headed right at the hazard and then locks up, unable to react to safely avoid it.
I have experienced this myself while cycling. I see a hazard on the road ahead like a pothole, a branch or some flat hazard. If I stare at it, I can wind up running right over it. I've also experience something like it will driving too. I have seen some very odd vehicle configuration ahead of me on the road. It is something I have never seen before. It looks strange, odd, interesting. I wind up staring at it trying to figure what the heck I am looking at. While all my attention is focused on that, although my vehicle is still well within my lane, I am not paying attention to traffic stopping in front of me.
Consider both sides of the argument
So I do not dispute that the phenomena of target fixation is real. However, I get concerned when anyone makes an attempt to use target fixation as an argument to justify suggesting cyclists would be safer not using taillights, either bright or flashing ones, during night riding. You have to consider the whole picture here.Certainly, the phenomena of target fixation is a potential risk. My understanding from materials I have read is that it is a more likely to occur in an impaired driver. That is, a driver that might be under the influence. However, what is the greater risk? Riding with bright and/or flashing taillights and encountering an impaired driver that might get fixated and then hit you or riding with no taillights whatsoever and getting hit because a driver doesn't see you or, perhaps almost as bad, causing that driver to have an accident because they are caught by surprise encountering you in the dark, overreact to avoid you at the last moment and wind up injuring themselves?
Lets walk through that again. For target fixation to be the cause of your injury, several things have to happen. You have to encounter an impaired driver. That driver has to become fixated on your taillight. The fixation has to be such that they do indeed wind up hitting you as opposed to a near miss because they react soon enough to avoid an accident. Note that the odds of encountering an impaired driver remain the same regardless of whether you are using a taillight.
On the other hand, consider what has to happen to be injured riding without any taillight. You have to encounter a driver (any driver impaired or not). That's it. That's all that has to happen! On roads without any shoulder, there is typically not enough space for a car and a bike to safely pass each other, especially if the bike's line of track is a typical 1-2 feet inwards from the roadside. The driver must take evasive action just to avoid hitting a bike. If they can't see you, or can't see you soon enough in advance, that won't happen and you'll be hit.
So, while there may be a statistically measurable increase in the likelihood that a cyclist could become the victim of a target fixation accident as a result of using such lights, there is absolutely no doubt whatsoever that there would be a substantially higher likelihood of being the victim of an accident simply because a driver is unable to see them in the dark.
Other issues with bike taillights
Now, there are some other issues with respect to cycling taillights that are probably worth more to worry about than target fixation. As you might reasonably conclude, observers have more difficulty judging distance and speed to a target that is intermittently visible (e.g. a rear flasher on a dark night) than one that is always visible (e.g. a taillight that is constant on). On the other hand, a flashing light tends to draw attention to itself more easily than a constant light. For this reason, I've heard many cyclists suggest riding with two lights; one flasher and one constant. Seems like a good idea.Next, there is the question of motorist's visual familiarity and practice of observing and identifying nighttime traffic hazards. The fact is, we all have practice identifying taillights of vehicles ahead of us on the road. Those lights are large, at least the size of our hands or bigger, constant on, come in pairs (a left and a right taillight). Taillights used in cycling are smaller, about the size of our thumb, are often flashing, sometimes in very bizarre patterns that are strange to unfamiliar observers, and of course do not come in pairs. This suggests using unusual or bizarre flashing patterns for rear taillights may not be the best thing for night riding.
For these reasons, it is reasonable to consider whether many motorists might be unfamiliar with this kind of flasher and upon seeing one for the first time, or at rare times, may wind up spending more attention (e.g. fixating) than one might think trying to figure out what they are seeing. That certainly reads suspiciously a target fixation scenario.
Lastly, if a motorist happened to confuse a dim constant on cycling taillight with a car taillight, the fact that its a smaller light might actually cause a serious misjudgement of distance; the motorist might think the vehicle is much further way than it actually is based on size. This is a good reason not to let your cycling taillight run low on battery power. A healthy battery in a cycling rear flasher often generates enough light to counteract any natural attempts to judge its true size.
In fact, I have experience with a driving problem similar to this with the headlight separation on Saturn sedans. Saturn manufactured its sedans with unusually closely separated headlights. When passing slower traffic on two-lane roads, the headlights from oncoming vehicles are a visual cue for estimating distance. Headlight separation is part of this. When observing an oncoming vehicle in the opposing lane, the closer together the headlights are, the further away the vehicle is. But, because Saturn's sedans have unusually close headlight separation, they can falsely appear further away than they really are causing a harmful misjudgement of distance. If their headlights were more separated than unusual, they would appear closer than they actual are and that would be harmless.
Sunday, November 30, 2014
Non Cycling Market Head Lights
The price of good lights for bikes that you would find at any bike shop are amazing to me. The low end for a decent, say 250 lumen light, is easily more than $100. And, they just go up from there.
What I've wanted for a bike light for a long time is a 500+ lumen light that I can use for several hours of night riding (actually as many hours as I am willing to carry extra batteries for) with field replaceable, rechargable batteries that is under $100.00.
Meet MonsterFlashlight. They offer a wide range of ultra-bright, portable flashlights. Some of their products are very suitable for cycling. I have been using their Tactical Pro T6-1000-4 for night riding for several years now. It has several modes including 3 different power levels; 1000 lumen (2 hours), 500 lumen (4 hours) and 150 lumens (6+ hours) as well as a flashing mode (10+ hours). It uses a single 18650, Li-Ion replaceable, rechargable battery. I use the extended life batteries, which MonsterFlashlight also manufactures and sells. I usually carry 2-3 extra batteries when I know I will be doing a lot of night riding.
The 1000 Lumens of this flashlight is plenty bright enough for any night riding I have done. I used it in the bowels of the Death Valley Fall double, decending from Hells Gate at 40+ mph at night and was very confident with how far down the road this light allowed me to see. Most lights designed specifcally for the cycling market are 500 Lumens and below and cost upwards of $200. The MonsterFlashlight Tactical Pro T6-1000-4, is only $65.00 for the flashlight. If you also by a charger and two extra, extended life batteries, the total price is still under $100.00.
When I originally started using this flashlight for my bike, MonsterFlashlight wasn't offering a handlebar mount. I purchased several different mounts on Amazon, each mount costing less than $5.00, to decide which is best. I have been happy with this one, which is less than $2.00. Also, originally, I had some problems with the flashlight not handling vibrations from my bike very well. The tail switch on the light would start to get finicky and the light would randomly go off and on as I went over bumps in the road. But, I talked with MonsterFlashlight and then suggested some servicing of the tail cap (which I did) and also sent me a replacement tail cap which has worked fine.
In addition, now apparently MonsterFlashlight is also selling a handlebar mount. But, at $19.00 its abit pricey. And, from the picture, it appears to be a mount already available through Amazon. So, I would just go to Amazon and search for "flashlight handlebar mount" and select from among the many options available there.
As an aside, Costco has been selling a 3-pack of Duracell LED flashlights that use AAA batteries for past several years. These started at 200 Lumens, then went to 250 and are now 300 Lumen lights. The pack of 3 costs only $20.00. They offer 2-3 different power levels including a flashing mode and are a terrific light for the price. Again, all you need is a decent handlebar mount for them.
For head mounted lights, I found this 300 Lumen, LED based headlight on Amazon for under $10.00 and have been very happy with it. It also uses a single 18650 Li-Ion battery (thats important so the two main lights I have use interchangeable batteries). And, the spot is focusable meaning you can have a wide beam or a narrow beam and easily adjust it while you ride. This light not only allows me to see forward and around turns but I use it also to read a route sheet or my Garmin computer while riding at night.
For rear flashers, I would recomend the Cygolight HotShot. At 2 watts, this light is awesomely bright! It is very visible from more than a mile in broad daylight. On flash, it has a 36+ hour runtime. It uses a built-in (which I don't like so much because I would like the option of replacing the battery if I have the misfortune of running out of power in the middle of a ride), rechargable Li-Ion battery.
Subscribe to:
Posts (Atom)